
Setting Up Your Workspace
Lathe cutting is a highly mechanical process, so the workspace plays an important role in the quality and consistency of a cut. While a professional studio isn’t required, the environment should be stable and predictable to avoid issues during cutting.
A lathe should sit on a solid, rigid surface such as a heavy bench or worktop to prevent vibrations from transferring into the groove. Movement from footsteps, doors, nearby machinery, or even traffic can affect playback quality, so using sturdy furniture, isolation feet, dense mats, or other vibration-reducing supports can help maintain stability.
Environmental conditions also matter. Temperature and humidity affect how plastic blanks behave during cutting—cold materials can become brittle, while dry air can increase static and make swarf harder to manage. A comfortable room temperature with moderate humidity generally provides the most consistent results.
Good lighting is also essential, allowing the operator to clearly see the groove, stylus, and swarf while cutting. Finally, the height of the lathe should allow for comfortable posture and clear visibility during long cutting sessions, helping maintain both accuracy and operator comfort.
Blanks:
The blank disc is a critical part of the cutting process. Most modern lathe cutting uses PETG plastic because it cuts cleanly with a diamond stylus and offers a stable balance between flexibility and durability. Blank thickness also affects performance: 2 mm blanks are commonly recommended for beginners because they are sturdy and less prone to warping, while thinner options like 1 mm or 1.5 mm are used for specialized formats or smaller records..
Anti-Static and Cleaning Fluids
Static, dust, and residue on blanks can interfere with cutting by causing swarf to stick to the stylus or fall back into the groove. Cleaning or anti-static fluids help reduce static buildup, keep the disc surface clean, and produce smoother grooves with less noise.
Heating Your Blanks
Warming the blank before cutting helps the material cut more smoothly. Cold discs can be brittle and lead to tearing or noisy grooves, so blanks are typically heated to around 30–35°C while spinning on the platter using a heat lamp.
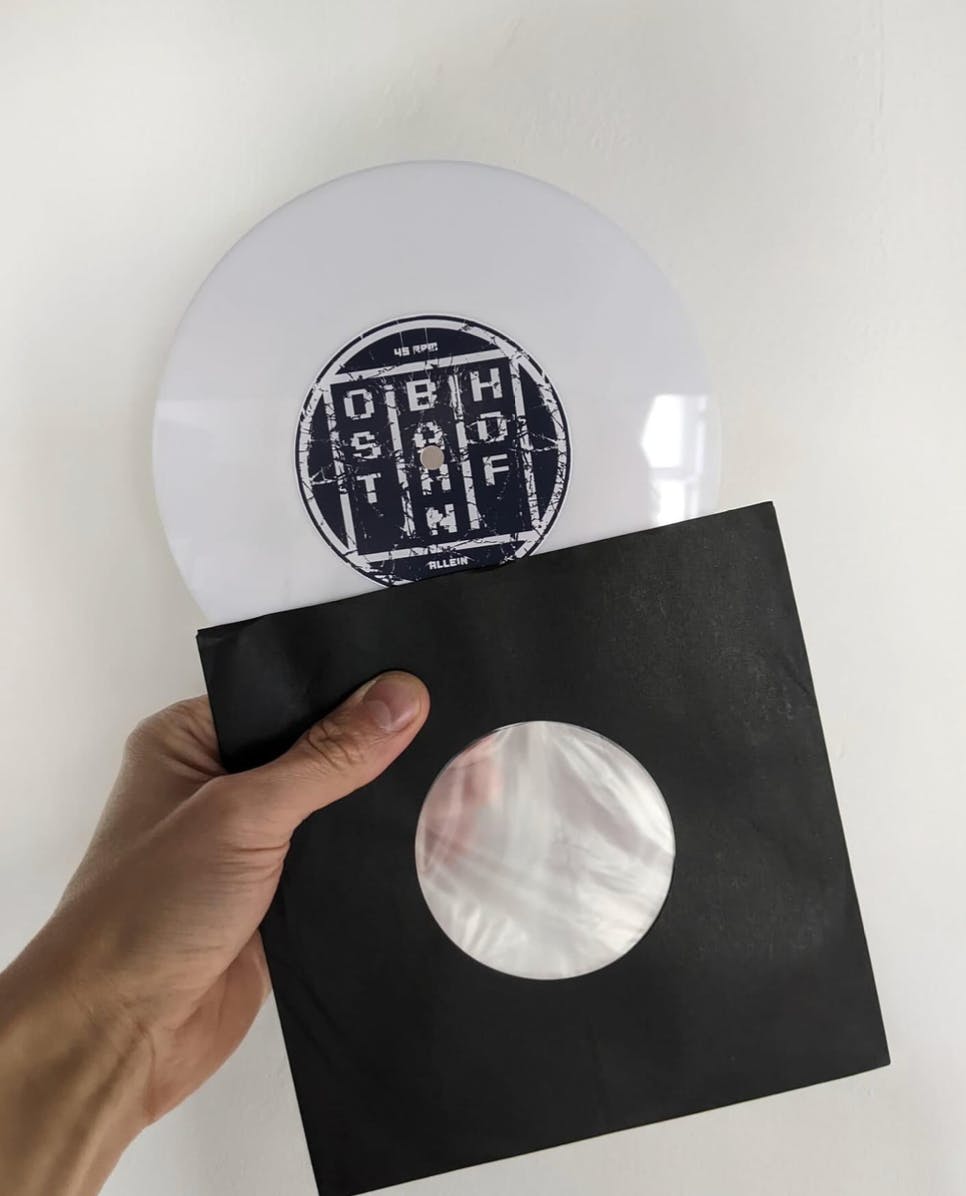
Centre Labels
Center labels are usually applied after cutting since lathe cut records are not pressed. Many cuts use blank labels for a dubplate look or printable labels from suppliers. Labels should be thin, flat, and properly centered to avoid interfering with playback.
Cutterheads
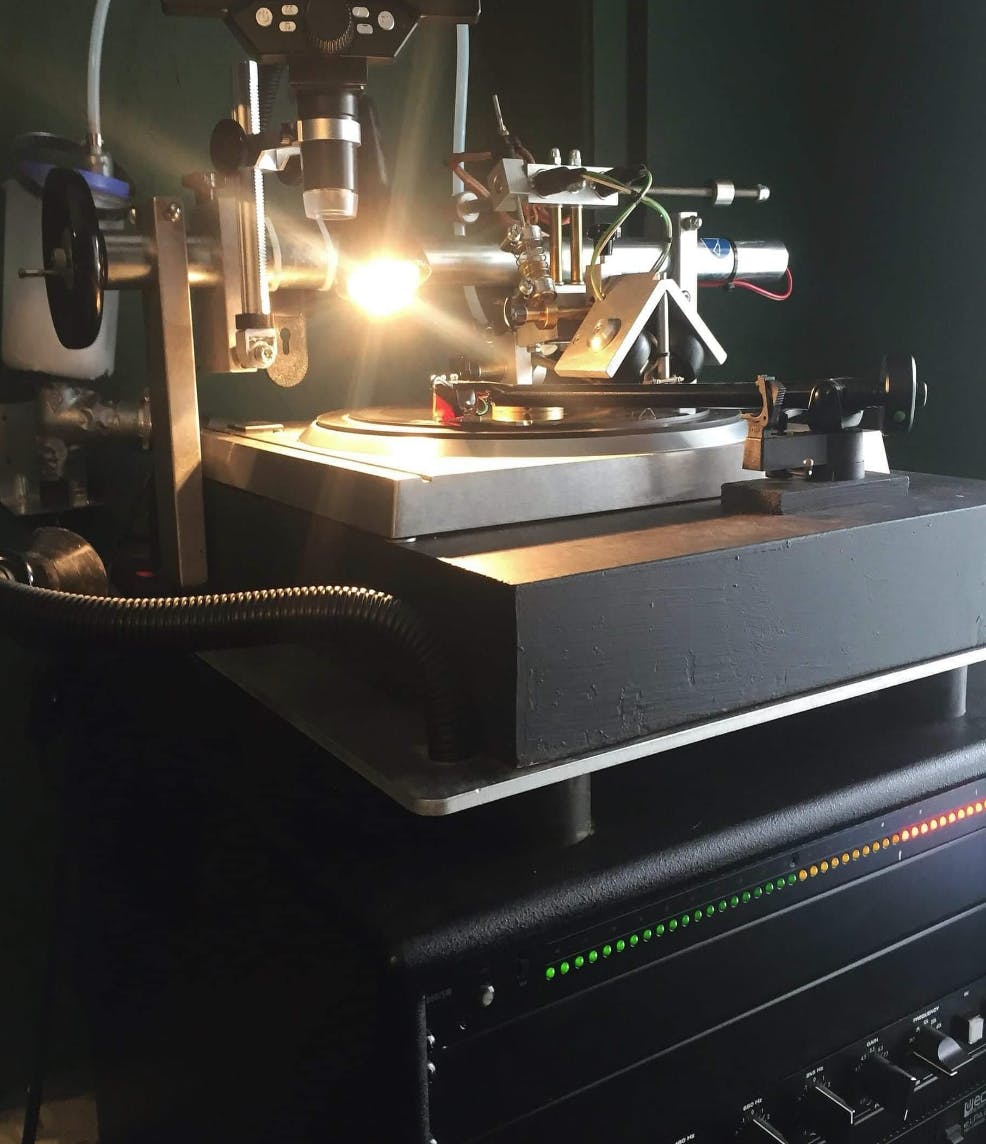
The cutterhead is a key component of the lathe, responsible for converting the electrical audio signal into physical movement that forms the groove on the disc. Understanding how the cutterhead works mechanically helps explain many of the issues that can occur during cutting.
Drive Coils
Drive coils convert the audio signal into movement. When the signal passes through the coils, it creates a changing magnetic field that interacts with magnets in the cutterhead. This movement is transferred to the stylus, allowing it to cut the groove into the record.
Push Rods
Push rods transmit the motion from the drive coils to the stylus assembly. The torque tube holds the stylus in place and ensures it is positioned at the correct angle and depth, helping maintain accuracy and stability during cutting.
Dynamic vs Feedback Cutterheads
Cutterheads are generally either dynamic or feedback. Dynamic cutterheads are simpler systems where the audio signal directly drives the stylus movement, relying on proper setup and calibration to achieve good results. Feedback cutterheads include additional sensors that monitor stylus movement and continuously correct it in real time, offering greater precision but requiring more complex equipment and calibration. Both types can produce high-quality results depending on the system and the skill of the operator.
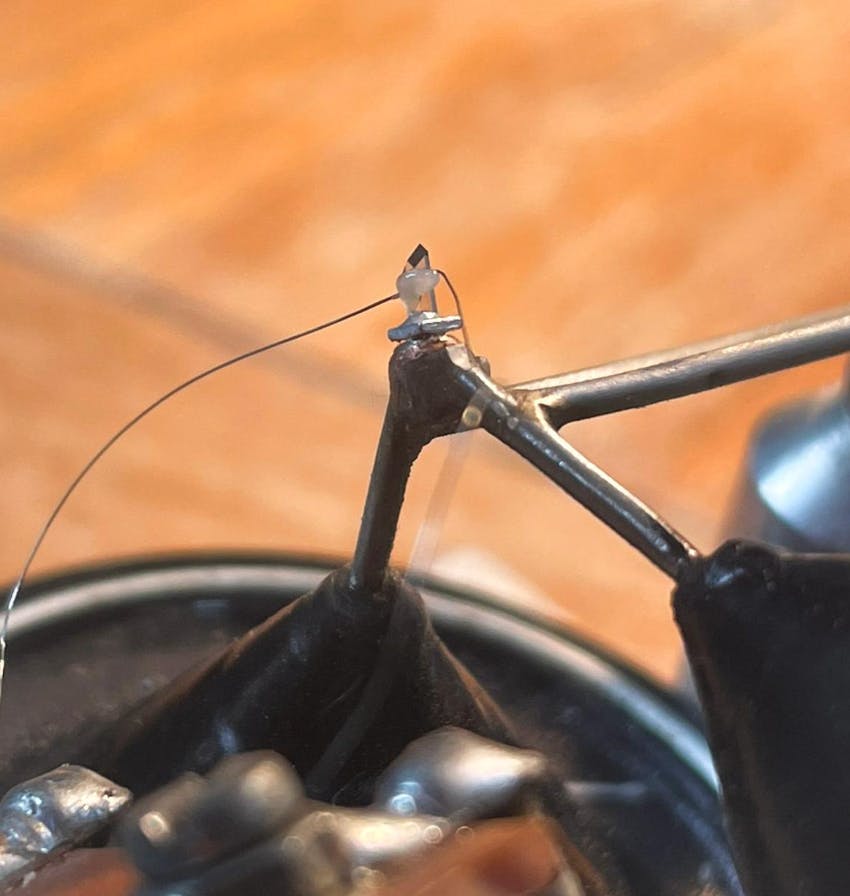
Diamonds and Styli
The stylus is the only part of the lathe that physically touches the disc and is responsible for cutting the groove. Even with a well-calibrated lathe, the quality of the stylus and how it is installed and maintained plays a major role in achieving clean, consistent cuts.
Styli Types
Styli are commonly referred to by formats such as 320, 362, or 462, which indicate the size and mounting style designed for specific cutterheads. While the diamond cutting edge itself is usually similar across these types, the holder size and how the stylus fits into the cutterhead differ. As a result, sound differences are typically influenced more by setup and calibration than by the stylus format itself.
Diamond Length
The length of the diamond stylus can affect how the system responds. Some lathes use longer diamonds than traditional mastering standards, which slightly changes the mechanical behavior of the stylus and may require adjustments to cutterhead EQ. Despite these differences, many systems using longer diamonds still produce reliable and high-quality cuts.
Cleaning, Heating and Care
Proper stylus maintenance is essential. Keeping the stylus clean prevents debris or residue from affecting the cut or accelerating wear. Stylus heating is commonly used to help the plastic flow more smoothly during cutting, producing cleaner grooves and swarf. Over time, stylus tips wear down, which can introduce noise or reduce high-frequency detail, making regular inspection and maintenance important.
Installing a Diamond Stylus
Installing a stylus requires careful handling and precise alignment. Dedicated stylus tools help insert and position the stylus correctly without damaging the cutterhead. Using a digital microscope allows operators to confirm that the stylus is centered, clean, and properly aligned before beginning a cut.
Calibration
Calibration is one of the most important steps in the cutting process. Without proper calibration, it becomes difficult to understand or fix problems because adjustments are based on guesswork rather than reliable reference points.
Playback Calibration
Calibration begins with the playback system. Using a test record, a reference tone (typically 1 kHz at 0 VU) is played through the turntable and preamp so the playback meter can be accurately aligned. This establishes a consistent reference level for evaluating cuts and making reliable EQ and level decisions.
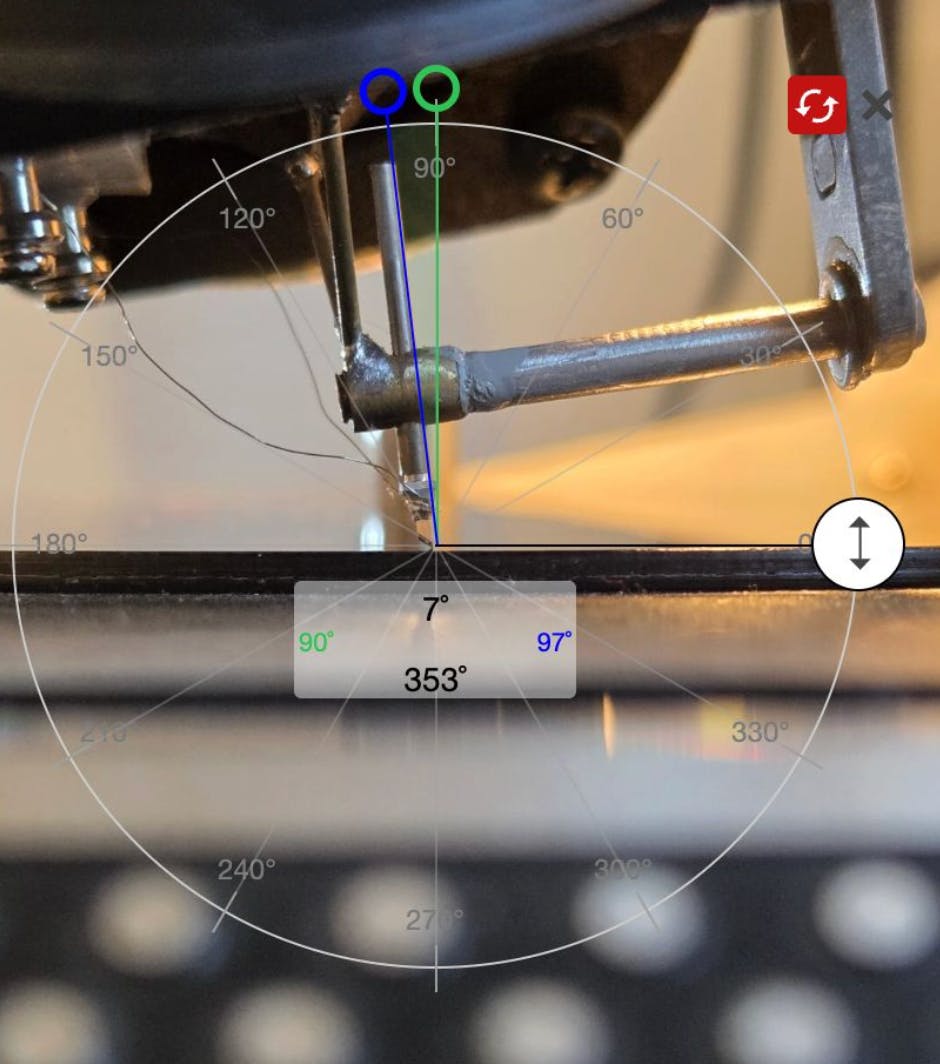
Rake Angle and Travel to Centre
The rake angle describes the angle at which the stylus meets the disc and directly affects how cleanly the groove is cut. When set correctly, the stylus removes material smoothly and produces consistent grooves. The stylus should also travel directly toward the center spindle as the record is cut, ensuring proper groove alignment.
Groove Depth
Groove depth is controlled by the balance between cutterhead weight and spring tension. The goal is a stable groove with consistent depth and well-defined walls. Depth is typically measured indirectly through groove width, with around 50–70 microns being a common range when cutting plastic blanks.
Stylus Heat
Stylus heating helps the plastic flow more smoothly as the groove is cut. Applying the correct amount of heat reduces surface noise and produces cleaner grooves, but excessive heat can damage the stylus or soften the groove walls. Adjustments are often made gradually based on listening and observation.
Vacuum System
A vacuum system connected to a chip jar removes swarf—the fine strands of material produced during cutting. Proper suction keeps debris away from the stylus and groove, preventing buildup that could affect cut quality or damage equipment.
Audio
Before cutting, audio is often calibrated to a consistent reference level, such as around –27 LUFS. This provides enough headroom for cutterhead EQ adjustments while maintaining a predictable signal level throughout the cutting process.
Microscope
A digital microscope is an essential tool for inspecting grooves and styli. High magnification allows operators to measure groove width, check stylus alignment, and monitor wear or debris, making it an important part of both calibration and ongoing maintenance.

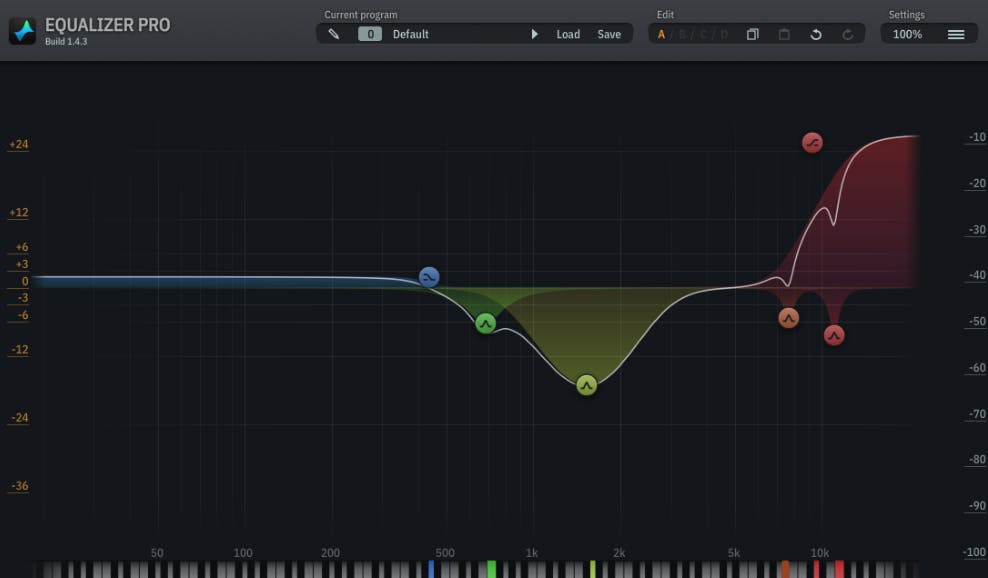
Cutterhead EQ
Although vinyl cutting and playback follow the RIAA standard, cutterhead EQ is not as simple as applying an inverse RIAA curve. Dynamic cutterheads behave differently depending on their design, stylus type, and setup, so creating a custom EQ profile based on how the cutterhead actually responds will produce more accurate and balanced cuts.
Playback Calibration
Before adjusting EQ, the playback system must be properly calibrated using a reference tone from a test record. This ensures that the playback meter reflects an accurate reference level, allowing reliable measurements when evaluating cuts.
Cutting Audio Without EQ
To identify the natural behavior and resonances of the cutterhead, audio is first cut without corrective EQ. Using well-balanced program material helps reveal the cutterhead’s natural frequency response and distortion profile.
Recording and Analyzing the Cut
The resulting cut is recorded back into a DAW and compared to the original audio. At this stage, the playback may sound dull or lacking high frequencies, which is expected before EQ correction is applied.
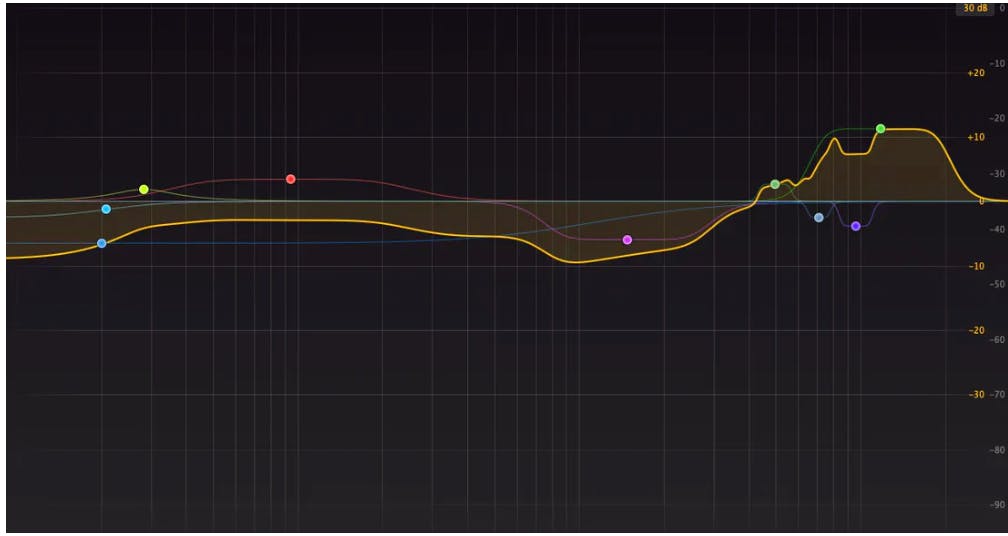
Creating a Custom EQ
Using tools such as match EQ software, the recorded cut is analyzed against the original audio. This allows the creation of a custom EQ curve that compensates for the cutterhead’s natural response and helps produce a more accurate final cut.
Testing and Refining the EQ
After applying the EQ, another test cut is made and compared again with the original audio. Adjustments are made until the playback closely matches the source material and the cutterhead performs as intended.
Troubleshooting Problems
Even with proper setup, issues can occur during cutting. Identifying and correcting these problems is part of the process of learning and improving results.
Surface Noise
Surface noise may be caused by debris on the stylus, stylus wear, improper calibration, incorrect stylus heat, or swarf buildup during cutting.
Swarf Sticking to the Disc or Stylus
If swarf clings to the stylus or disc, it may indicate issues with vacuum alignment, static buildup, insufficient blank heating, or stylus wear.
Skipping or Groove Jumping
Playback skipping can occur when grooves are too shallow, spaced too closely, or when excessive bass or phase issues create unstable groove movement.
Muffled or Dull Sound
A lack of high-frequency clarity may result from incorrect EQ settings, internal clipping in the signal chain, or a worn stylus.
Wow and Flutter
Unstable playback pitch can be caused by excessive cutterhead weight, dashpot movement issues, or insufficient turntable torque.
Motor Noise or Vibration
Mechanical vibration from the turntable, vacuum system, or cutting surface can transfer into the groove and affect playback quality.
Warped Discs
Warped blanks can disrupt cutting and damage styli. Checking blanks beforehand and carefully heating them can help correct minor warps.
Distorted Sound
Distortion during cutting may be caused by excessive signal levels, clipping in the EQ stage, or damage to the stylus.
Channel Imbalance
Uneven audio between channels may be due to amplifier settings, signal chain issues, wiring problems, stylus misalignment, or cutterhead component faults.